
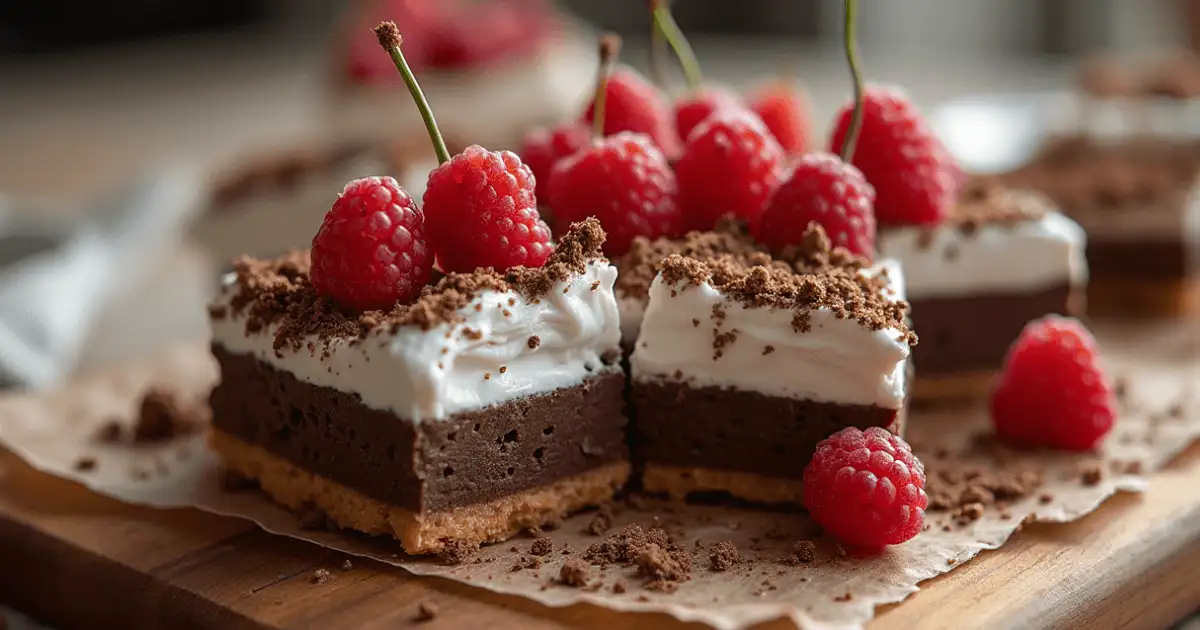
Have you ever craved a dessert that’s rich, indulgent, and unbelievably easy to make? These Black Forest Bars might just be your new favorite treat. Imagine the classic flavor combo of chocolate and cherry, baked into soft, chewy bars that feel straight out of a bakery—but made right in your kitchen with simple pantry staples.
Whether you’re planning a family gathering, prepping a crowd-pleasing dessert for a potluck, or just treating yourself after a long day, this recipe delivers. With just a few steps, you’ll have a decadent, no-fuss baking creation that looks impressive and tastes even better. Let’s dive in—you’re going to love how easy (and irresistible) these bars are!
Table of Contents
Key Benefits
Let’s talk about why these Black Forest Bars deserve a spot in your dessert rotation. If you’re all about easy dessert bars that look impressive but require minimal effort, you’re in for a treat. Here’s what makes this recipe such a standout:
- Effortlessly Easy: With a handful of pantry staples and a box of chocolate cake mix, you can whip up these bars in no time—no fancy tools or skills needed.
- Flavor-Packed Layers: The sweet-tart cherry pie filling pairs beautifully with rich, chocolatey goodness, creating that nostalgic Black Forest flavor in every bite.
- Perfect for Sharing: These bars cut cleanly and travel well, making them a hit at family gatherings, potlucks, or bake sales.
- Customizable to Your Cravings: Want to add a personal touch? Sprinkle in semi-sweet chocolate chips, a dash of almond extract, or a handful of chopped nuts for extra crunch and flavor.
- Make-Ahead Friendly: These bars taste even better after chilling, so you can make them a day ahead and let the flavors meld together.
So, whether you’re baking for a celebration or just need something sweet to brighten your day, these crowd-pleasing dessert bars check all the boxes—simple, rich, and completely irresistible.
Ingredients
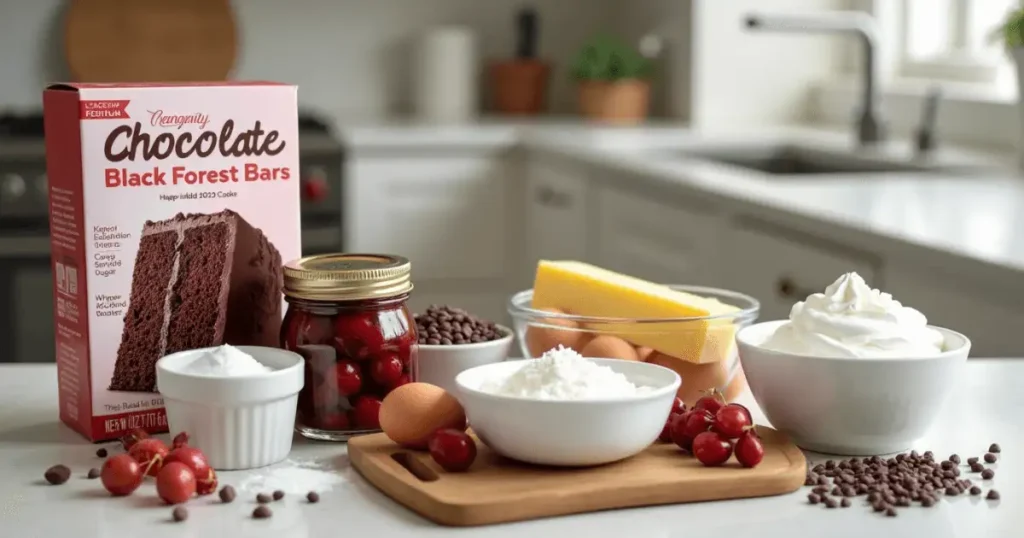
Here’s everything you’ll need to bring these Black Forest Bars to life. The beauty of this recipe is its simplicity—most of the ingredients are probably already in your pantry. Each one plays a key role in creating that rich, cherry-chocolate magic we all love.
Main Ingredients:
- 1 box chocolate cake mix – acts as the rich, chocolatey base; no need to prepare it as directed on the box.
- 2 large eggs – binds everything together and adds structure.
- 1/2 cup unsalted butter, melted – gives the bars a soft, chewy texture and buttery flavor.
- 1 can (21 oz) cherry pie filling – sweet and tangy, this is the heart of the Black Forest flavor.
- 1 cup semi-sweet chocolate chips – for melty, gooey chocolate pockets in every bite.
Optional Add-ins (Customize it!):
- 1/2 tsp almond extract – enhances the cherry flavor with a nutty twist.
- 1/3 cup chopped walnuts or pecans – adds a crunchy texture contrast.
- Sprinkle of shredded coconut – for extra richness and a fun flavor twist.
Topping (Optional but Recommended):
- Whipped cream or whipped topping – a dollop on top makes it feel extra special.
- Maraschino cherries or fresh cherries – for a pretty and classic garnish.
Pro Tip: Use a non-stick spray or parchment paper to line your baking pan for easy removal and cleaner slices. These bars love to cling to the pan if left ungreased!
Now that you’ve gathered your goodies, let’s move on to the fun part—baking them to perfection!
chocolate takes center stage in this recipe, but if you prefer chocolate, feel free to experimental. Use other recipes of chocolate.
How to Make Black Forest Bars

Ready to whip up a dessert that looks fancy but is secretly super simple? These Black Forest Bars come together in just a few steps—and the smell of chocolate and cherries baking is half the joy! Let’s walk through it together:
What You’ll Need:
- A 9×13-inch baking dish
- Mixing bowl and spoon or spatula
- Oven preheated to 350°F (175°C)
- Non-stick spray or parchment paper
Step-by-Step Instructions:
- Prep Your Pan and Oven
Preheat your oven to 350°F (175°C). Grease your 9×13-inch baking dish or line it with parchment paper for easy removal. - Mix the Base Layer
In a large mixing bowl, combine:- The chocolate cake mix
- Melted butter
- Eggs
Stir until a thick, sticky dough forms—this will be your rich, fudgy base.
- The chocolate cake mix
- Press and Layer
- Press about two-thirds of the dough evenly into the bottom of the prepared pan.
- Spoon the cherry pie filling over the base, spreading it out to cover evenly.
- Drop the remaining dough in small spoonfuls over the cherry layer—it doesn’t need to fully cover it. Those cherry peeks will bake up beautifully.
- Press about two-thirds of the dough evenly into the bottom of the prepared pan.
- Add the Chocolate Chips
Sprinkle semi-sweet chocolate chips across the top. As they melt during baking, they’ll add that gooey, chocolate-laced goodness we all love. - Bake to Perfection
Pop it into the oven and bake for 35–40 minutes, or until the top is set and slightly golden. The edges may puff a little and pull away from the pan. - Cool Before Cutting
Let the bars cool completely in the pan. This helps them firm up and slice cleanly—plus, the flavors settle in even better as they rest.
Helpful Hint: If you’re short on time, pop the pan into the fridge once it’s mostly cool. Chilled bars slice even cleaner and are perfect for make-ahead desserts.
Up next—let’s explore some pro tips and fun twists to make these bars uniquely yours!
Pro Tips and Variations
Once you’ve nailed the basic recipe (which is super simple, by the way!), there’s a whole world of ways to tweak these Black Forest Bars to fit your cravings, the season, or whatever you’ve got in the pantry. Whether you’re going for rich and indulgent or light and fruity, these ideas will help you personalize the flavor without overcomplicating things.
Pro Tips for Perfect Bars
- Let Them Cool Completely
It’s tempting to dig in while they’re warm, but cooling allows the bars to set properly. You’ll get cleaner cuts and richer flavor once they’ve had a chance to rest. - Use Parchment for Easy Cleanup
Lining your pan with parchment paper makes it a breeze to lift the entire batch out and cut neat squares. No sticking, no mess. - Don’t Overbake
Keep an eye on the edges—when they’re slightly crisp and the center is set (not jiggly), it’s time to pull them out. Overbaking can dry them out. - Add Almond Extract for a Bakery-Style Touch
Just ½ teaspoon goes a long way in bringing out the cherry flavor and giving your bars that signature Black Forest taste.
Easy Flavor Variations
Want to mix things up? Try these delicious tweaks:
- Triple Chocolate Dream
Mix in dark chocolate chunks or drizzle melted white chocolate over the top once cooled for an extra decadent bite. - Nutty Crunch
Fold in chopped walnuts, pecans, or slivered almonds to add texture and balance the sweetness. - Gluten-Free Option
Use a gluten-free chocolate cake mix and double-check your cherry filling for hidden gluten—voilà, a treat everyone can enjoy. - Coconut Bliss
Sprinkle sweetened shredded coconut on top before baking for a tropical twist. It toasts beautifully and adds a chewy finish. - Holiday-Ready
Add a sprinkle of red and green sprinkles or mini white chocolate chips for a festive look during the holidays.
These easy dessert bar ideas let you transform a basic recipe into something totally unique every time you bake. Whether you’re going classic or creative, there’s no wrong way to enjoy these delicious treats!
Serving Suggestions
So, your Black Forest Bars are baked, cooled, and looking absolutely irresistible—now what? It’s time to make the most of their rich, chocolatey goodness with some fun and thoughtful serving ideas. Whether you’re sharing with guests or treating yourself to a cozy night in, these tips will help you serve them up like a pro.
Perfect Pairings
- Coffee or Espresso:
A cup of strong coffee balances the sweetness and deepens the chocolate flavor—especially with a sprinkle of cocoa powder or dark chocolate shavings on top. - A Scoop of Vanilla Ice Cream:
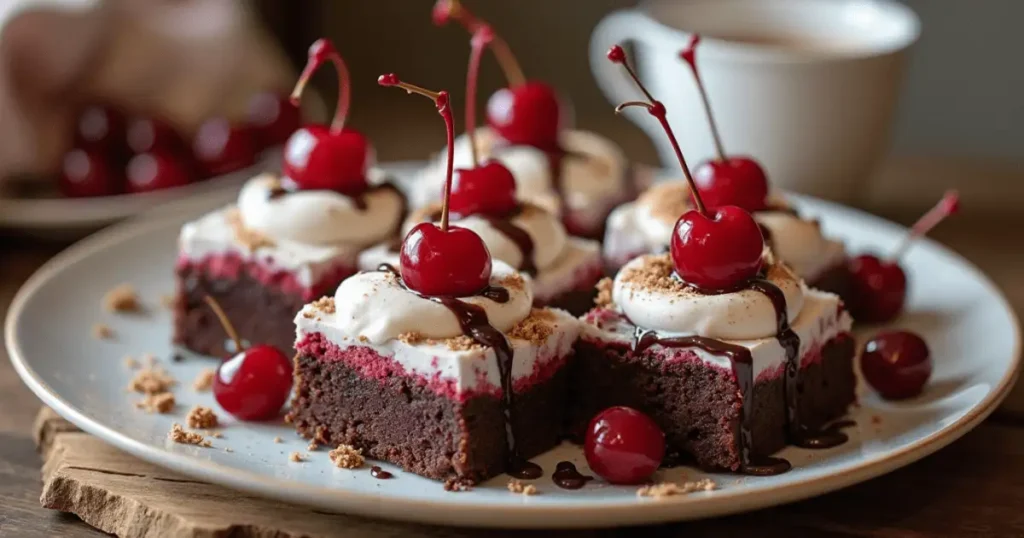
Serve a warm bar with a scoop of vanilla bean ice cream for the ultimate comfort dessert. The contrast of hot and cold is simply dreamy! - Whipped Cream & Fresh Cherries:
Channel that classic Black Forest cake vibe by topping each bar with a dollop of whipped cream and a single cherry for an elegant touch.
When and Where to Serve
- Dessert Tables & Potlucks:
These bars travel well and are always a crowd-pleaser. Just slice, stack in a container, and go—no fork required! - Holiday Celebrations:
Their rich flavor and bold look make them ideal for festive gatherings. Dress them up with edible glitter or drizzle with melted dark chocolate. - After-Dinner Treats:
A perfect sweet bite to end any meal. Serve them slightly warmed with a drizzle of cherry syrup for extra indulgence.
Storage Tips for Freshness
- Room Temperature:
Store in an airtight container for up to 3 days. - Refrigerated:
Keep in the fridge for up to 5 days if you prefer a firmer texture (especially great in warm weather). - Freezer-Friendly:
Freeze in layers separated by parchment paper for up to 2 months. Thaw at room temp when ready to serve.
Conclusion
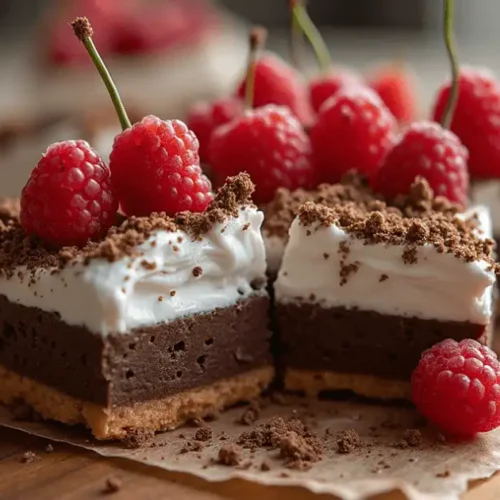
And just like that, you’ve created a batch of Black Forest Bars that are sure to melt hearts with their perfect blend of rich chocolate, sweet cherries, and creamy textures. Whether you’re baking for a family gathering, a potluck, or simply treating yourself, these bars offer the ultimate combination of ease and indulgence.
Their versatility means you can customize them to fit any occasion—from festive holiday desserts to cozy evenings with a cup of coffee. And the best part? They’re incredibly simple to make, but look and taste like something out of a bakery.
Don’t forget, these bars are all about enjoying the process, so feel free to play around with the variations, toppings, and serving suggestions. The end result will always be a delicious, crowd-pleasing treat.
Happy baking, and may every bite of your Black Forest Bars bring a little extra sweetness to your day!
Feel free to try out the variations and let us know how your own personal spin on the recipe turns out. We love hearing how you make it your own!
_________________
Black Forest Bars
Ingredients
Main Ingredients:
- 1 box chocolate cake mix – acts as the rich chocolatey base; no need to prepare it as directed on the box.
- 2 large eggs – binds everything together and adds structure.
- 1/2 cup unsalted butter melted – gives the bars a soft, chewy texture and buttery flavor.
- 1 can 21 oz cherry pie filling – sweet and tangy, this is the heart of the Black Forest flavor.
- 1 cup semi-sweet chocolate chips – for melty gooey chocolate pockets in every bite.
Optional Add-ins (Customize it!):
- 1/2 tsp almond extract – enhances the cherry flavor with a nutty twist.
- 1/3 cup chopped walnuts or pecans – adds a crunchy texture contrast.
- Sprinkle of shredded coconut – for extra richness and a fun flavor twist.
Topping (Optional but Recommended):
- Whipped cream or whipped topping – a dollop on top makes it feel extra special.
- Maraschino cherries or fresh cherries – for a pretty and classic garnish.
Pro Tip: Use a non-stick spray or parchment paper to line your baking pan for easy removal and cleaner slices. These bars love to cling to the pan if left ungreased!
- Now that you’ve gathered your goodies let’s move on to the fun part—baking them to perfection!
Instructions
What You’ll Need:
- A 9×13-inch baking dish
- Mixing bowl and spoon or spatula
- Oven preheated to 350°F (175°C)
- Non-stick spray or parchment paper
Step-by-Step Instructions:
- Prep Your Pan and Oven
- Preheat your oven to 350°F (175°C). Grease your 9×13-inch baking dish or line it with parchment paper for easy removal.
- Mix the Base Layer
- In a large mixing bowl, combine:
- The chocolate cake mix
- Melted butter
- Eggs
- Stir until a thick, sticky dough forms—this will be your rich, fudgy base.
- Press and Layer
- Press about two-thirds of the dough evenly into the bottom of the prepared pan.
- Spoon the cherry pie filling over the base, spreading it out to cover evenly.
- Drop the remaining dough in small spoonfuls over the cherry layer—it doesn’t need to fully cover it. Those cherry peeks will bake up beautifully.
- Add the Chocolate Chips
- Sprinkle semi-sweet chocolate chips across the top. As they melt during baking, they’ll add that gooey, chocolate-laced goodness we all love.
- Bake to Perfection
- Pop it into the oven and bake for 35–40 minutes, or until the top is set and slightly golden. The edges may puff a little and pull away from the pan.
- Cool Before Cutting
- Let the bars cool completely in the pan. This helps them firm up and slice cleanly—plus, the flavors settle in even better as they rest.
Helpful Hint: If you’re short on time, pop the pan into the fridge once it’s mostly cool. Chilled bars slice even cleaner and are perfect for make-ahead desserts.
- Up next—let’s explore some pro tips and fun twists to make these bars uniquely yours!
Notes
- Calories: 250 kcal
- Fat: 12g
- Saturated Fat: 5g
- Cholesterol: 35mg
- Sodium: 180mg
- Carbohydrates: 32g
- Fiber: 2g
- Sugars: 22g
- Protein: 3g
FAQs
As much as we love these Black Forest Bars, we know you might have a few questions before diving into the recipe. Here’s a handy FAQ section to clear up any doubts and help you make the best bars possible!
1. Can I substitute frozen cherries for fresh ones?
Yes, you can! Frozen cherries are just as fine as fresh cherries. Simply thaw them and pat them dry before using them in the recipe to avoid excess moisture. If you’re using cherry pie filling, that’s an easy option too—just be sure to drain it well before spreading it on the bars.
2. How do I know when the bars are done?
The bars are done when the edges are slightly golden and the center is firm to the touch (no longer jiggly). If you’re unsure, use a toothpick to check—it should come out mostly clean with just a few crumbs. They’ll continue to set as they cool.
3. Can I make these Black Forest Bars ahead of time?
Definitely! These bars actually taste even better the next day as the flavors have had time to meld together. You can store them in an airtight container at room temperature for up to 3 days, or refrigerate them for up to 5 days. If you want to keep them even longer, freeze them in layers with parchment paper for up to 2 months.
4. Can I make these bars gluten-free?
Yes, you can! Simply swap out the cake mix for a gluten-free chocolate cake mix. Just make sure the cherry filling you use is also gluten-free, and you’re good to go!
5. How can I make these bars even more indulgent?
For an extra special treat, drizzle melted chocolate over the bars once they’re cooled. You can even sprinkle on some chopped nuts, like walnuts or pecans, to add texture and a delightful crunch.
6. Can I freeze the dough for later?
Absolutely! You can prepare the dough in advance and store it in the freezer. Once ready to bake, simply let it thaw in the fridge overnight and proceed with the recipe as usual.
Got more questions? Feel free to leave them in the comments, and we’ll be happy to help! Enjoy your baking adventure with these delicious Black Forest Bars—you’re going to love them!